
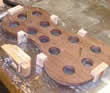
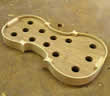
 1. Blocks of wood, typically made out of Spruce, Poplar, or
Willow, are placed in violin molds made of Walnut wood. 1. Blocks of wood, typically made out of Spruce, Poplar, or
Willow, are placed in violin molds made of Walnut wood. |
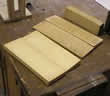
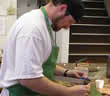 2. Ribs
for the C bouts are bent into shape using a special iron. 2. Ribs
for the C bouts are bent into shape using a special iron. |
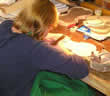
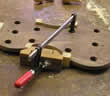 3. C
bouts are then attached with glue to the violin mold and clamped into place 3. C
bouts are then attached with glue to the violin mold and clamped into place |
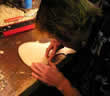
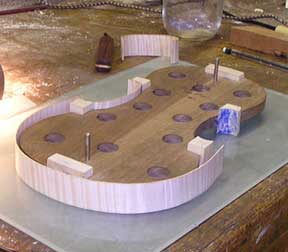 4. After
the C bouts are in place, the rest of the ribbing is attached to the blocks. 4. After
the C bouts are in place, the rest of the ribbing is attached to the blocks. |
 5. A
thin wooden lining is placed inside the ribbing to reinforce the violin when the
mold is removed. 5. A
thin wooden lining is placed inside the ribbing to reinforce the violin when the
mold is removed. |
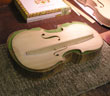
 6. Wood
is then chosen for the top, back (Spruce), and scroll (Maple) of the violin. The
top and back can be made out of one piece of wood or two pieces glued
together. 6. Wood
is then chosen for the top, back (Spruce), and scroll (Maple) of the violin. The
top and back can be made out of one piece of wood or two pieces glued
together.Learn more about the wood |
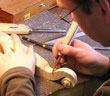
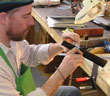
 7. The
wood is "arched" or carved into the correct shape. Then a channel is cut along
the perimeter of the top of the violin for the purfling to be placed into. 7. The
wood is "arched" or carved into the correct shape. Then a channel is cut along
the perimeter of the top of the violin for the purfling to be placed into. |
 8. The
purfling is placed into the channel and more arching is done to smooth the shape
of the top and bottom of the instrument. 8. The
purfling is placed into the channel and more arching is done to smooth the shape
of the top and bottom of the instrument. |
 9. A
bass bar is then added to the underside of the top of the violin. 9. A
bass bar is then added to the underside of the top of the violin. |
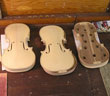 10. The
body of the violin is now complete (3 violin pictures) 10. The
body of the violin is now complete (3 violin pictures) |
 11. The
scroll is then carefully sized. An error as small as a millimeter can completely
change the feel of a violin. 11. The
scroll is then carefully sized. An error as small as a millimeter can completely
change the feel of a violin. |
 12. The
scroll is then carved into the desired shape. 12. The
scroll is then carved into the desired shape. |
 13. The
fingerboard, made of ebony, is carefully shaved into shape 13. The
fingerboard, made of ebony, is carefully shaved into shape |
 14.Once
pieces of the violin are finished, the instrument is carefully glued. Clamps are
placed along the instrument until the glue dries. 14.Once
pieces of the violin are finished, the instrument is carefully glued. Clamps are
placed along the instrument until the glue dries. |
- The Basic Theory
- The Wood
- The Model
- Basic Tools (including patterns and templates)
- The Mould
- Ribs, Blocks, Linings
- Caring the Back and Bop (inlaying the perfling)
- Cutting the Sound Holes
- Letting in the Bass Bar
- Assembling the Body
- Carving the Scroll and Neck Mortising and attaching the neck
- Violin fittings
- Bridge
- Sound post
- Varnishing
- Adjusting and testing
- Conclusion
No hay comentarios:
Publicar un comentario